

Table of Contents
- Why Van Electrical System Maintenance Matters
- Van Battery Maintenance: Keep Your Power Source Healthy
- Create a Van Electrical System Checklist for Regular Inspections
- Fuses, Wiring, and Electrical Connections
- Van Solar System Maintenance for Off-Grid Reliability
- RV Electrical Troubleshooting: Diagnosing Problems with Measurable Tests
- Preventing Corrosion, Moisture, and Vibration Damage
- Frequently Asked Questions
Last Updated: October 16, 2026
Why Van Electrical System Maintenance Matters
A dead battery at mile 200 of a remote desert highway teaches you something quickly: van electrical system maintenance isn't optional.
Most van owners discover electrical problems the hard way: a corroded terminal, a loose wire, a fuse that blows without warning.
At PrimeRVGoods, we work with van owners who boondock for weeks without hookups.
Below are the exact steps to inspect, maintain, and troubleshoot your van electrical system.
Van Battery Maintenance: Keep Your Power Source Healthy
Your battery is the foundation of everything electrical in your van. Most problems start here, so focus your maintenance effort here.
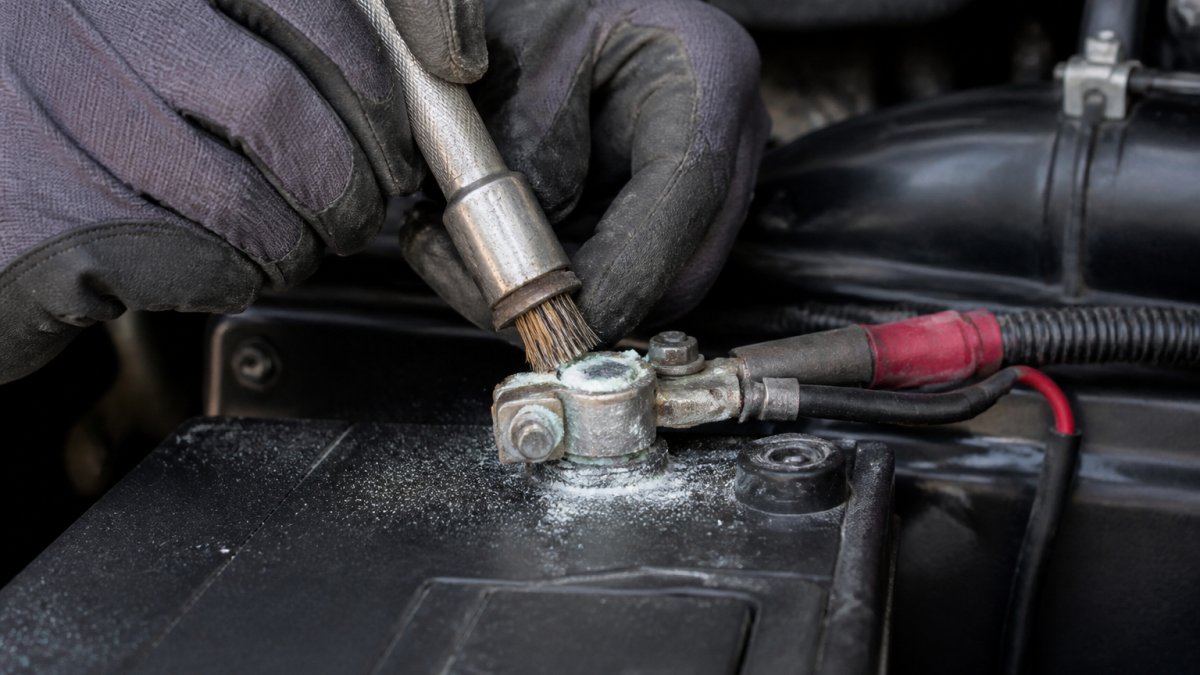
Battery terminal inspection and cleaning
Check your battery terminals every month. Corrosion builds up fast in humid or salty environments; white, blue, or green crusty deposits mean oxidation is blocking power flow and straining your charging system.
Here's how to clean terminals properly:
- Disconnect the negative battery cable first (always negative, never positive)
- Mix baking soda with water to make a paste
- Scrub the terminals and cable ends with an old toothbrush or wire brush
- Rinse with clean water and dry completely
- Reconnect the negative cable last
Tighten the cable clamps firmly after cleaning. Loose connections create resistance and heat, and a loose terminal can drop voltage by 0.5V or more.
Check cable condition too. Cracked, frayed, or melted insulation causes shorts and fires, replace the cable.
Lithium battery and BMS care
If you've upgraded to a lithium battery, you're running a more complex system. Its built-in Battery Management System (BMS) monitors voltage, current, and temperature, respect what it does, it's protecting your battery and your van.
The BMS will disconnect the battery if:
- Temperature drops below freezing (lithium hates cold)
- Voltage climbs too high during charging
- Current spikes beyond safe limits
- Internal cell voltage becomes unbalanced
Don't fight the BMS. If it cuts power, something is wrong. Check your solar charge controller settings or alternator voltage output.

Lithium batteries need less maintenance than lead-acid, but they need the right environment.
Create a Van Electrical System Checklist for Regular Inspections
A checklist keeps you consistent. Electrical problems hide until they cause real damage. Catching them early saves money and prevents breakdowns.
Monthly inspection routine
Spend 30 minutes once a month on these checks:
- Battery terminals: Look for corrosion, tightness, and cable condition
- Fuses: Check that all fuses are seated firmly and haven't blown
- Visible wiring: Look for cracks, melting, or loose connections
- Battery voltage: Use a multimeter to check resting voltage (should be 12.8V for lead-acid, 13.2V for lithium at rest)
| Check | Frequency | What to Look For | Action |
|---|---|---|---|
| Battery terminals | Monthly | Corrosion, loose clamps | Clean and tighten |
| Fuses | Monthly | Blown fuses, loose seats | Replace or reseat |
| Wiring | Monthly | Cracks, melting, loose ends | Repair or replace |
| Voltage | Monthly | Below 12.8V (lead-acid) | Check charging system |
| Ground wires | Monthly | Corrosion, looseness | Clean and tighten |
Seasonal deep checks
Every 3 months, do a deeper inspection:

-
Check every visible connection, wiggling wires and terminals by hand. Tighten anything that moves.
-
Inspect the alternator for cracks, loose mounting bolts, or corroded connections.
-
Test your shore power connection by plugging in and checking voltage at your main panel (should read 120V AC in the US).
-
Inspect solar panels for cracks, loose mounting, or dirt buildup. Clean with water and a soft cloth; dirt reduces output by 10-20%.
-
Check wire routing so wires aren't rubbing against sharp edges or hot surfaces.
Fuses, Wiring, and Electrical Connections
Fuses and wiring are the nervous system of your van, carrying power safely and protecting circuits from overload. A single bad connection can cascade into multiple failures.
Fuse holder inspection and replacement
Your fuse panel is usually near the battery or main distribution point. Open it and look at every fuse:
- Blown fuses have a broken filament inside (you can see it visually)
- Loose fuses rattle in their holders and create arcing
- Corroded fuse holders have white or green deposits
If a fuse blows repeatedly, don't just replace it, something is drawing too much current. Find the circuit that keeps blowing and trace the issue with a multimeter.
Replace corroded fuse holders, corrosion blocks current flow and causes voltage drop, and new holders are cheap insurance.
Wire gauge sizing and cable protection
Wire gauge matters. Undersized wire heats up under load and melts insulation, which can short to ground and start a fire.
Use this rule: thicker wire for longer runs and higher currents.
- 12V battery to 30A load, 10 feet: Use 4 AWG wire
- 12V battery to 50A load, 20 feet: Use 2 AWG wire
- 12V solar to charge controller, 30 feet: Use 10 AWG wire
If you're not sure, go one size thicker. It costs a few dollars more and prevents problems.
Protect wires from vibration and heat with split loom tubing or conduit along any wire near the engine, exhaust, or moving parts.
Tightening and securing connections
Loose connections are the #1 electrical problem in vans. Every month, wiggle every accessible connection, if it moves, tighten it.
12/24V Car Power Circuit Probe 40FT/12M Cable Circuit Tester with Relay/Fuse →
Use a multimeter to check voltage drop across a connection:
- Set the multimeter to DC volts
- Put the negative probe on the negative battery terminal
- Put the positive probe on the far end of the circuit (at a load)
- If voltage drop exceeds 0.5V, the connection is too loose or corroded
Tighten battery cable clamps with a wrench to 50-60 inch-pounds (not foot-pounds). Over-tightening strips threads and damages terminals.
Van Solar System Maintenance for Off-Grid Reliability
If you run solar panels, your charging system is more complex. Solar controllers, panels, and wiring all need maintenance to keep you powered.
Solar panel and charge controller checks
Solar panels are durable, but dirt and damage reduce output:
- Clean panels quarterly with water and a soft cloth (no soap or harsh chemicals)
- Check for cracks or delamination, if the glass is damaged, water will get inside and corrode the cells
- Verify mounting bolts are tight (vibration loosens them over time)
- Check wiring connections where panels connect to the charge controller
Your solar charge controller is the brain of the system. Check it monthly:
- Look at the display for error codes or low voltage warnings
- Verify charging current, on a sunny day you should see current flowing to the battery
- Check temperature, over 140°F means cooling is poor
- Test manual controls to make sure you can adjust settings
A quality controller like the PowMr 80A/100A MPPT solar charge controller supports lithium batteries with proper charging profiles and multi-stage charging algorithms. It tracks temperature and adjusts charging automatically.
Shore power and alternator charging verification
If you use campground hookups or an alternator to charge, verify these systems work:
Shore power checks:
- Plug into a campground pedestal
- Use a multimeter to check voltage at your main breaker (should read 120V AC)
- Check that your converter is charging the battery (look for current flow on the battery monitor)
- Unplug and verify the battery wasn't damaged by a bad connection
Alternator checks:
- Start the engine and let it warm up
- Check battery voltage at rest (should be 12.8V or higher)
- Turn on the engine and check voltage again (should climb to 13.5-14.5V)
- If voltage doesn't climb, the alternator isn't charging
- Check alternator connections for corrosion or looseness
- Have a mechanic test the alternator if voltage stays low
RV Electrical Troubleshooting: Diagnosing Problems with Measurable Tests
When something fails, you need a way to diagnose it. A multimeter is your best tool. It's inexpensive and tells you exactly what's happening.
Using a multimeter to check voltage and continuity
A basic multimeter costs $15-40 and solves 80% of electrical problems. How to use it:
Checking voltage:
- Set the dial to DC volts (usually marked "DCV" or "V" with a line and dots)
- Touch the black probe to a ground (negative battery terminal)
- Touch the red probe to the circuit you're testing
- Read the voltage on the display
For a 12V system, you should see 12.8-14.5V depending on whether the battery is charging.
Checking continuity:
- Set the dial to the continuity or resistance setting (usually marked with an ohm symbol Ω)
- Disconnect power from the circuit (critical, never test continuity on a live circuit)
- Touch both probes to the ends of the wire or connection
- If the multimeter beeps or shows near-zero ohms, the connection is good
- If it shows infinite resistance or doesn't beep, the wire is broken
Locating short circuits and ground faults
A short circuit happens when power finds a path to ground it shouldn't, usually blowing a fuse or tripping a breaker immediately.
To find a short:
- Turn off all loads and switches
- Remove the fuse from the circuit that keeps blowing
- Set your multimeter to resistance (ohms)
- Touch the probes to the two terminals of the fuse holder
- You should see infinite resistance (open circuit)
- If you see low resistance (under 10 ohms), something is shorted
Once you've confirmed a short, trace the circuit by unplugging loads one at a time and testing again. When resistance jumps to infinity, you've found the bad component.
A ground fault is similar but trickier. It's power leaking to ground through a damaged wire or component.
When to call a qualified electrician
Stop DIY troubleshooting if:
- You find melted or burned wires (fire risk)
- You can't locate the problem after checking all connections
- The battery drains overnight with nothing running (parasitic draw is hard to find)
- Your charge controller or battery management system shows repeated error codes
- You smell burning plastic or see smoke
These problems need professional tools and training. A mobile RV electrician can diagnose issues faster than trial-and-error and carries parts to fix it on the spot.
Preventing Corrosion, Moisture, and Vibration Damage
Three enemies destroy electrical systems in vans: corrosion, moisture, and vibration.
Corrosion happens when moisture and salt (or battery acid) attack metal.
Moisture enters through cracks, loose connections, and condensation.
Vibration loosens connections and wears through insulation.
Your van's electrical system is reliable when you maintain it consistently.
Start with the monthly checklist this month, then make it a habit.
Frequently Asked Questions
How often should you check a van's electrical system?
Inspect your van electrical system monthly during regular use, checking battery terminals, connections, and fuse holders for corrosion or looseness. Perform a seasonal deep check every three months, testing voltage at rest and under load, and verifying all charging sources (solar, alternator, shore power). If you're boondocking regularly or using lithium batteries, monthly checks prevent small issues from becoming costly failures.
How do you maintain batteries in a campervan?
Keep battery terminals clean and free from corrosion by inspecting them monthly. For lithium batteries with a BMS (battery management system), monitor the system's display for error codes and state of charge. Charge regularly to maintain battery lifespan, avoid deep discharges below 20%, and store the battery in a temperature-controlled area when not in use. Tighten battery cable connections every six months to prevent voltage drop and overheating.
What should you check if your van's electrical system stops working?
First, disconnect the negative battery terminal and wait 30 seconds, then reconnect it to reset the system. Check that all fuses are intact and seated properly in the fuse holder. Inspect battery terminals for corrosion or loose connections and clean if needed. Use a multimeter to verify battery voltage (should read 12.8V or higher for a healthy battery). If the battery reads low, check your charging sources: solar panels, alternator output, and shore power connections. If voltage is normal but circuits remain dead, test continuity in wiring and look for loose ground connections.
How do you diagnose RV electrical problems with a multimeter?
Set your multimeter to DC voltage mode and test the battery terminals directly; a healthy 12V battery should read 12.8V or higher at rest. Test voltage at key connection points (fuse holders, busbar, inverter input) to locate voltage drops that signal poor connections. Switch to continuity mode to check for broken wires or bad grounds by connecting the probe to a known ground point and testing each circuit. If a circuit reads no continuity, the wire is broken or disconnected. A power probe tester with a 40-foot cable, like the 12/24V circuit tester available at PrimeRVGoods, helps you trace circuits and locate short circuits without disconnecting components.